I have been smelling fall since the end of July, when I discovered an excited little maple that jumped the gun on everything deciduous and slipped into its fiery fall finery. I could hardly wait for September to get here! (WARNING: This post will be excessively exclamation point heavy…but I mean, isn’t Autumn ALL about superlatives for heaven’s sakes?!!) I recently came across a quote (sorry no author): “And all at once, summer collapsed into fall.” (You can see it here: pinterest.com/farnia/autumn-people-with-autumn-thoughts/) Isn’t that fabulous!!! And so absolutely perfectly true?!!!! I waited for all of August to collapse into September and September is finally here! Don’t you just love the word, “September?” How lilting it sounds…that beautiful word simply sings. If I had another child I’d probably name it September. Even if it was a boy. I’ll just have to settle on naming the next living thing that comes into my backyard, September, and call it good.
I love the way the shadows lengthen and sneak around the corners of the house in September. The way the light plays on the surface of everything changing it into something….well, something special. I love the sweet smell of September! The scent of plants waning and dying back, trees yielding up their sweetness in the changing leaves, wood smoke (even though there’s a burn ban on our island, I swear I can l smell wood smoke!) and the scent of the earth when I pull up my beets and carrots–like tired and worn out soil, ready for a rest. The rain smells different. My world smells different. You can feel September as it runs cool fingers over your skin or as it whispers to you in the crisp morning air, or as it cuddles up with you in the decidedly duskier evenings. I’ve spied spiders spinning their webs for a month, geese practicing v-formations, fawns loosing their spots as their summer hides thicken into winter coats and the earth gradually pulling itself away from its growth, ready to tuck everything into bed for a long winter’s nap.
Autumn isn’t officially here until the Autumn Equinox, which arrives September 22 at 10:29 PM. Get your party hats and your sparklers! Don’t you just LOVE the word equinox?!! And when that beautiful word pairs with Autumn, they create most evocative pairing of words in human language. Several years ago I read that Autumn comes down from the North Pole 15 miles a day after the Summer Solstice. (Don’t you LOVE the word solstice?!) I beckoned to Autumn every single day….Come on, hurry home….I’m waiting.
Do any of you experience the Nesting Instinct when Autumn comes? When I was young I read the fable, The Ants and the Grasshoppers. It tells the story of an industrious group of ants who labored all summer long to put food aside for the winter while they watched a lazy old grasshopper fiddling away his days idly playing his fiddle. Once September arrives, that nesting instinct rises up in me and I am a flurry of fall activity, just like those ants. I’m canning like crazy right now. I’ve canned close to 100 quarts of beans already (some dilled and with a little help from my friend) and peaches and tomatoes arrive tomorrow afternoon. Beets, both pickled and bottled, wait in the wings. Chili sauce gets made mid-September. I’ve cleaned and reorganized and want to DO! Never mind that I’ve been DOING all summer long. When September finally arrives, it puts its seal of approval on the true definition of DOING. I have had conversations with myself about why I shouldn’t bring up the Halloween decorations and start spooking my halls! Seriously. I want to make fall projects, LOTS of fall projects and decorate my house by bringing the outside inside. I have some time yet before that happens and so in the spirit of Fall project making, I want to share a project to get those Autumn juices of yours flowing. September is the perfect time for projects and this one is super easy and fast. I made one in less time than it took for a batch of laundry to wash. So light your pumpkin-scented candle and let’s get to work.
Bad photo disclaimer: I had to take these pictures with my cell phone because right now my Canon Eos and I are trying really hard to be friends. The Eos is more of a closed book than I am and as willing as the Eos is to give friendship, there are conditions.
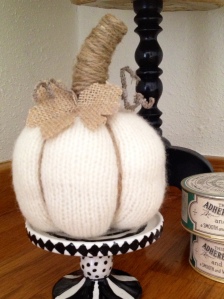 I made this dainty stuffed pumpkin from a sweater. So the very first thing you need, of course, is a WOOL sweater. It has to be 100% wool or Angora. I have found sweaters at Goodwill, Value Village. A good friend of mine on the island, who works at our local thrift store, saved me donated wool sweaters destined for destruction due to moth holes. Last year she brought me an orange sweater that I immediately felted and made into pumpkins to give as gifts. This year, as I have no orange sweaters, I’m using cream, black and brown sweaters. That said, find yourself a wool sweater in a fall-ish shade and made sure it is LARGE or EXTRA LARGE, men’s sweaters work best, but there seems to not be many men’s wool sweaters out there for some reason. (Do men hang onto things longer than women do?) Take your sweater home and toss it into your washing machine using hot water. Throw it into your dryer using your hottest temperature. When it comes out of the dryer, it will look like a bitty baby sweater and will be perfectly felted and it will not unravel. That, my friends is why you want a large or extra-large sweater, the bigger the better so you can make many pumpkins. I first saw the idea of stuffed pumpkins on a blog where they used the sleeves of men’s shirts. You do have that option, but I prefer the squishy nature and the texture of the sweater as it converts itself into a pumpkin.
This is a list of what else you will need besides the sweater:
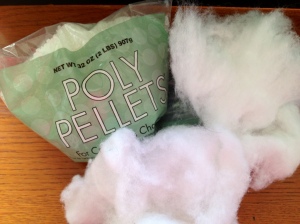
Twine, jute or butcher’s twine; rubber bands; heavy quilting thread or crochet thread; poly pellets or small dried beans or rice (consider the food alternative ONLY if you plan on storing these where creepy crawly critters won’t eat the guts out of your finished pumpkins); fiberfill batting; wide burlap ribbon (mine was 2 1/2-inches wide); Fabri-Tac or glue gun and glue sticks.
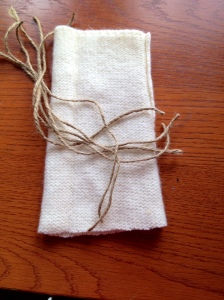
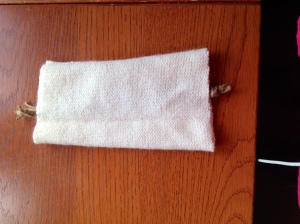
Step 1: Lay your sweater out flat (I did not take a picture of this part, but figured you could fill in the gaps.) Turn it inside out. You are going to use the sleeves and depending on the size of your pumpkins and your sweater, you can usually get two to three small pumpkins from one sleeve, or one small and one medium pumpkin. Decide about how big you want your pumpkin and then cut straight across the sleeve. (Down the line, after you have used both your sleeves to make pumpkins, you will have the entire body of your sweater left and you ou can still make lots of pumpkins. Decide how wide and long you want your finished pumpkin, but double the width, then cut. For example, if you want a 6″ x 10″ pumpkin, cut a piece of your sweater 12″ by 10″. Fold the sweater over itself to create a long tube; in the case of our example, 6″ by 10″, and using your sewing machine stitch up the open side.)
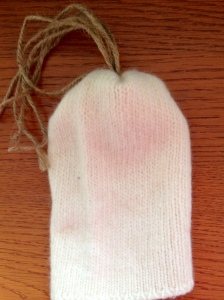
Step 2: Measure out 6 lengths of jute, twine or butcher’s string about an inch or so longer than the length of the sweater piece you just cut. Gather all those pieces of twine and tie a knot in one end. Insert the knotted end into the narrow end of the sleeve so that the knot comes out at the wider end. Then gather the sweater around the knot so it looks like a flower and wrap a rubber band around the whole thing, adjusting the gathers.
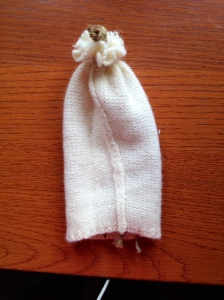
Because I do not trust the power of a rubber band after so many years, I wrap the gathered area with crochet thread, winding around that gathered area 6 or 8 times and then tie it off. Turn your sleeve inside out so that it looks like this.
Step 3: Pour poly pellets (or beans or rice, if you’re brave), depending upon the size of your pumpkin (a larger pumpkin means more pellets, smaller pumpkins less) into the bottom of your pumpkin, enough pellets so the pumpkin will sit by itself if you leave it alone. Start stuffing your shape with the fiberfill. I like my pumpkins firm. The poly pellets allow your pumpkin to rest on its laurels, so to speak, and it will sit more authoritatively wherever you place it. Stuff it firmly, leaving about 3-inches of space for the stem. You’re going to squish all that fiberfill down as you fill it and adjust it so you don’t have unsightly bulges and gapped areas. You can see a bulge on the right. I simply stuffed in a little more fiberfill and moved and settled everything.
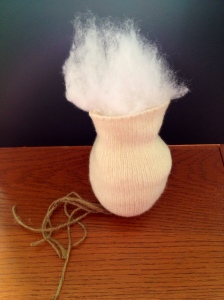 That poof of fiberfill at the top is only to show you the step involved. I did not actually have that puffle of fiberfill in there when I finished–just empty space. I left 3-inches or so of sweater unfilled, where the curve is above the waist of the shape.
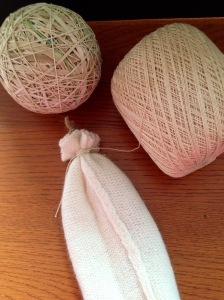
Step 4: 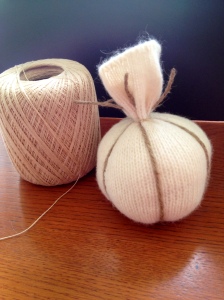 Bring the 6 pieces of twine up to the top, pulling and evenly separating the strands as you go to create a pumpkin shape. Are you so excited!!! You are well on our way to having a pumpkin!!!! Wrap a rubber band around the sweater and twine. Wrap that area with crochet thread or heavy-duty thread 6-8 times, the same way you did at the bottom, and tie it off. Take each piece of jute and pull upwards until you magically get that perfect pumpkin shape, pulling on the other 5 pieces of twine up until you have achieved your desired shape.
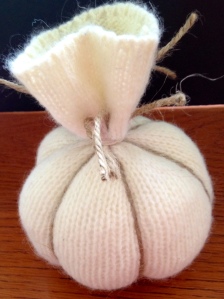 Tie two strands of jute together, then tie two more strands together and then the last two strands. You can either leave the strands long or trim them slightly, but leave them at least an inch long. Et voilà! Cute, right? So now we are going to create pumpkin personality, if you will. I believe that a pumpkin’s personality is its stem. You may see a lot of pumpkins out there, but a pumpkin without his stem is just…..well, another sort-of-round, orange fruit. A stem is what defines a pumpkin. I could totally start giving pumpkins names based only on their stems. Never, I repeat, NEVER lift a pumpkin by its stem or you may end up with an personality-less, same old pumpkin…aka an orange orb.
Step 5: Take a long length of twine, jute or baker’s twine (I left mine on the skein because I can’t tell you how much to cut off and you don’t want to have too little), leaving a 2″ tail at the base and hold the tail down with your thumb so you don’t accidentally catch it as you wind. Begin winding the twine up the sweater stem, catching those strands of twine you trimmed, pulling and winding and keeping everything evenly taught as you wind. I hold my stem at an angle when I’m winding because I just like the look. You can keep yours straight if you like that better. When you reach the top, wind back down, trying to make things evenly concentric and covering any white spaces and trying NOT to hurry to the bottom, which will make your circles droopy and uneven.
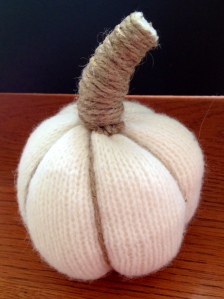 When you get to the bottom, tie the two ends together and trim. Don’t worry about the knot.
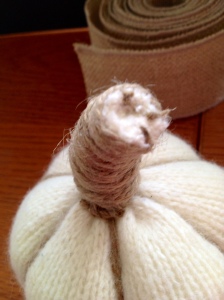
So there are some people who feel that leaving the end of that pumpkin ragged or with the fabric peeking out or even GASP!– leaving their personality unevenly trimmed is okay. Totally up to you, my friends. Me? I’m a little OC and the open end bugs me. I dabbed Fabri-Tac all over the end. I so love this stuff. It dries quick and it is dependable and it totally works on other mediums as well so it’s not just a one-shot wonder. I took a small length of twine, put the end in the center and started a spiral to cover that entire white part. When I came to where the twine started on the outside, I dabbed a bit more Fabri-Tac on the end I’d been winding and pushed it into the twine effectively hiding it, then dabbed a little more Fabri-tac on the area for good measure.
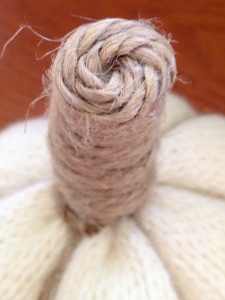 MUCH nicer, agreed? You are almost to the end of this baby and on your way to pure pumpkin enjoyment.
Step 6: 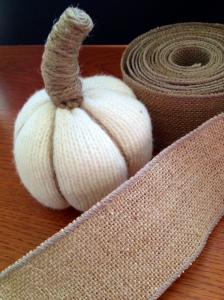 The shirt-sleeve pumpkin that inspired me initially had pumpkins leaves cut from burlap and tendrils made from the same twine used for the ribs and personality of the pumpkins. You would have made yourselves crazy and this fun, quick and easy little project would have turned ugly on you in a heartbeat You would have climbed the walls, itching your skin and snuffling your nose as the bad old burlap fibers wrecked havoc with you. Not to mention all the mess with Modge Podge. If you are unable to find burlap ribbon, which I cannot even fathom because that stuff is everywhere…online, Michael’s, Joann’s, Hobby Lobby….but IF you are unable to find it and you only have burlap hanging around, use it. In that case, you want to have gloves, Modge Podge and a waxed paper covered surface and a lot of patience or a hairdryer. The beauty of the burlap ribbon is that it is with something that keeps the burlap together, even after you cut it. Easy peasy, lemon squeezy. And the other bonus of using the burlap ribbon? You get tendrils in the making! Trim them off the sides of your burlap ribbon to the length you want your tendrils. Remember to make them longer, though, because you will curl them around a pencil and they get shorter. I am not going to share how to use regular burlap for the leaves and the twine to make tendrils using Modge Podge. If you really, truly, honest-to-peanuts want to know, leave a comment and I will share how to do it for the benefit of those others out there who do not have enough fun in their days and far too much time on their hands.
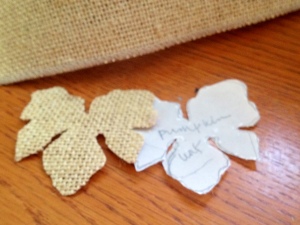 I went to a very cute cupcake and cake decorating website and the little bakerella girlie generously provided perfect pumpkin-leaf templates. I shrunk the size of the PDF from 100% to 70% on my computer, selected the smallest leaf, put a piece of vellum over the image on my screen and traced that little leafie and the template fit perfectly on my 2 1/2″ piece of burlap ribbon. You don’t want to include the wire edges in your leaf, so cut them off before you cut out the leaf. Here’s the link for the template: http://www.hurryupcakes.com/wp-content/uploads/2009/05/pumpkinleaves.pdf.
Cut a length of the wire carefully away from the burlap. I had the ones in the picture left over from a project last year and Mr. Farnia and I used them to tie cedar roping to our stair railings outside. Over the winter, they weathered to a perfect deep brown and smell wonderfully of cedar. Bonus.
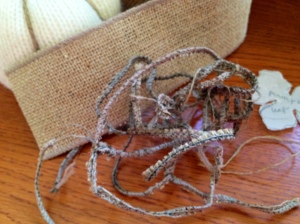 Wrap the wire pieces around the stem and twist a couple of times then curl them with a pencil. Take your leaf and dab Fabri-Tac on the back and push it into the stem to hide the knot. Hold it there for a second or two. The Fabri-Tac dries quickly, but I wanted to hedge any bets that it wasn’t quite dry and stuck a couple of pins to keep it in place. I poked the glued area a couple of times while it was drying to make sure the pumpkin and leaf stayed connected. You could spray glitter spray over your leaf before attaching or lightly spray the entire thing with glitter spray.
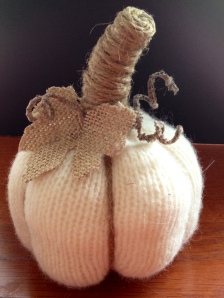 That’s it. Cute little pumpkin, right? I named this little beauty Stella, after an adorable, dimpled, wee precious punkin’ that came into our family two weeks ago. Aw. This little Stella stands about 5 1/2 inches high in her stocking feet and is about 4″ across. She will be a gift for someone so dear to my heart.
I would love to know if you make these. I would love to see pictures of your pumpkins.
Naming them is completely optional.
